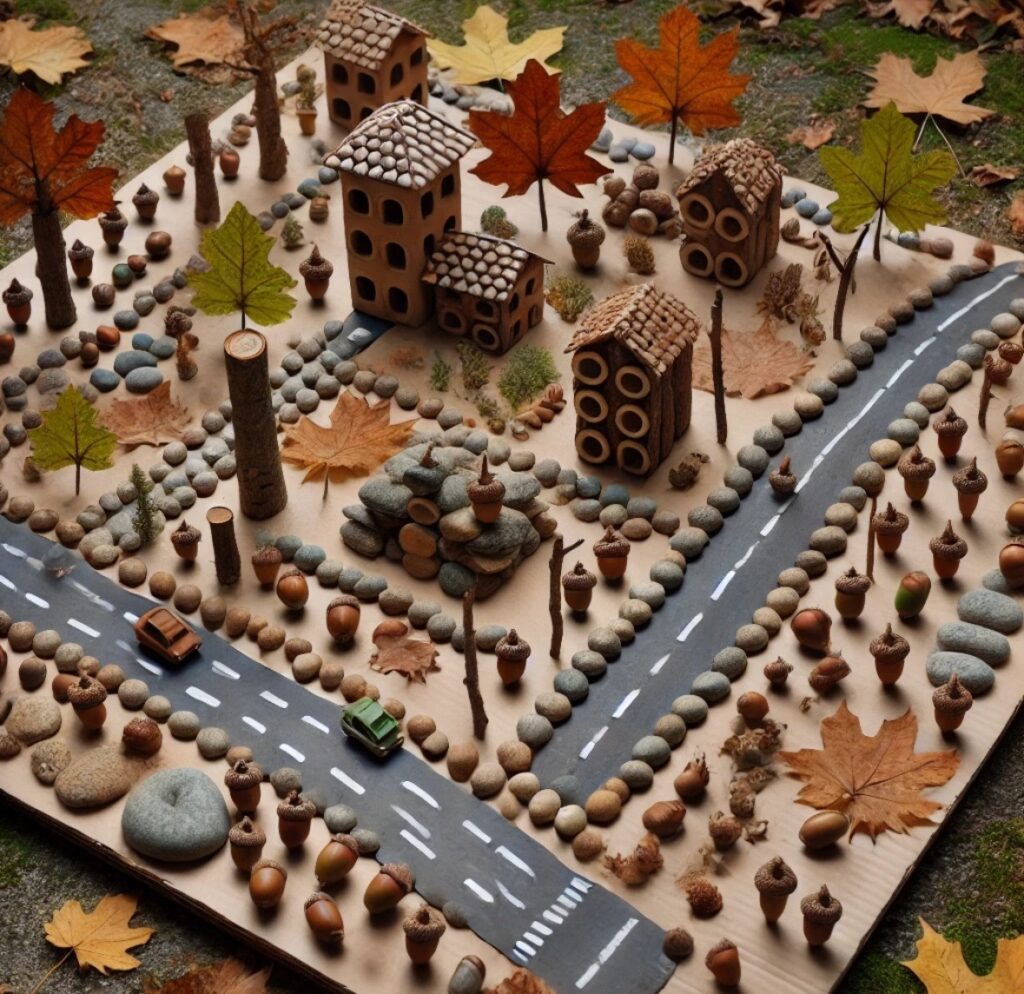
Fall is a wonderful time for preschoolers to engage in creative play and learning, and what could be more fun than building a mini city for toy cars using natural materials collected during a fall walk? This hands-on project not only sparks imagination and creativity but also incorporates lessons in science, engineering, and environmental awareness. Here’s a step-by-step guide to help you and your young learners create a bustling stick-and-leaf city this autumn.
Materials Needed:
- Natural Items: Collect sticks, leaves, acorns, small stones, and other natural materials during your fall walks.
- Toy Cars: Any small toy cars that the children enjoy playing with.
- Cardboard Base: A large piece of cardboard to build your city on.
- Markers or Paint: For designing roads and other city markings.
- Glue or Tape: To secure the structures and roads.
Step 1: Collect Materials
Begin with a nature walk to collect various natural items that can be used to build your city. Look for sticks of different sizes for building frames, flat leaves for roofs, stones for decorations, and acorns for traffic lights or decorations.
Step 2: Design Your City Layout
On a large piece of cardboard, help your preschoolers sketch out the layout of the city. Draw roads, parking lots, and designated areas for buildings. This is a great opportunity to teach basic map skills and spatial awareness.
Step 3: Build the Structures
Start constructing buildings using the sticks. You can make simple structures by forming squares or triangles and securing the corners with glue or tape. Use leaves to create roofs, and flat stones to build walls or pathways. Let the children use their creativity to decide what each building is and how it’s constructed.
Step 4: Add City Details
Once the basic structures are in place, it’s time to add details. Use markers or paint to draw on the cardboard base, adding road lines, crosswalks, and parking spaces. Acorns can be placed as stoplights or decorative trees along the streets.
Step 5: Play and Learn
Allow the children to play with their mini city using their toy cars. Encourage imaginative play by asking them to create stories about the people who might live in the city, what jobs they might have, and how they interact with the environment around them.
Step 6: Discuss and Reflect
After playtime, have a discussion with the children about the project. Ask them what they learned from building the city, what they liked about using natural materials, and how they think people in cities live differently from people in other environments.
Benefits of This Activity
- Creativity and Imagination: Building a mini city allows children to use their imagination to design and play.
- STEM Learning: Engaging with basic engineering and problem-solving as they construct buildings and plan layouts.
- Environmental Education: Using natural materials helps children learn about the environment and the importance of sustainable practices.
Conclusion
Building a mini city for toy cars is a fantastic project that combines fun, learning, and creativity. It’s a perfect group activity for a crisp fall day and offers numerous educational benefits. Plus, it’s a great way to turn a simple walk into a grand urban planning session!
Enjoy your city-building adventure this fall, and remember, the only limit is your imagination!